
Subfloor preparation is the most important step before any flooring installation. Whether you’re installing hardwood, luxury vinyl plank, laminate, tile, or carpet, proper subfloor preparation helps prevent squeaks, moisture damage, and costly repairs. You finally picked your floors. The samples look great, the price is right, and you’re ready to go. But before one plank, tile, or carpet fiber gets installed, there’s something that happens underneath it all — something most homeowners never think about until it causes problems. According to the National Wood Flooring Association (NWFA), proper subfloor preparation is essential for a successful installation https://nwfa.org.
Subfloor prep. It’s not glamorous, but it’s everything.
At Selah Floors, we’ve seen beautiful new floors buckle, gap, squeak, and fail — not because of the material itself, but because of what was (or wasn’t) done underneath it. This guide walks you through what subfloor preparation actually looks like, in plain terms, so you know what to expect and what questions to ask.
What Is a Subfloor, Anyway?
Your subfloor is the structural layer directly beneath your finished flooring. It sits on top of your floor joists (in wood-framed homes) or directly on the concrete slab (common in Texas construction). It’s the foundation your floors live on.
There are two main types:
- Concrete slab
— Very common in Houston-area homes, especially slab-on-grade construction. No basement, no crawl space. Just concrete. - Wood subfloor — Usually plywood or OSB (oriented strand board), typically found in two-story homes or older construction. Sits on top of floor joists.
Each type has its own prep process.
Why Does Subfloor Prep Matter?
Think of it this way: even the most expensive floor in the world will fail if it’s installed on an uneven, wet, or damaged subfloor. Here’s what goes wrong when prep is skipped:
- Squeaks and creaks — Usually caused by movement between the subfloor and joists, or improperly fastened panels.
- Buckling and warping — Moisture trapped under flooring causes LVP, hardwood, and laminate to expand and lift.
- Hollow spots and soft areas — A sign of damaged or delaminating subfloor that wasn’t replaced.
- Grout cracking (tile) — Tile is unforgiving. Even slight subfloor flex will crack grout lines within months.
- Flooring warranty voided — Most manufacturers require a flat, dry, structurally sound subfloor. Skip prep, skip your warranty.
Concrete Subfloor Prep
If you’re in a typical Houston-area home, there’s a good chance your main living areas sit on a concrete slab. Here’s what needs to happen before flooring goes down:
1. Check for Moisture
Concrete is porous. Moisture can wick up through it, especially in our humid South Texas climate. A moisture test (either a calcium chloride test or a plastic sheet taped to the floor for 24–72 hours) tells us how much vapor is coming through.
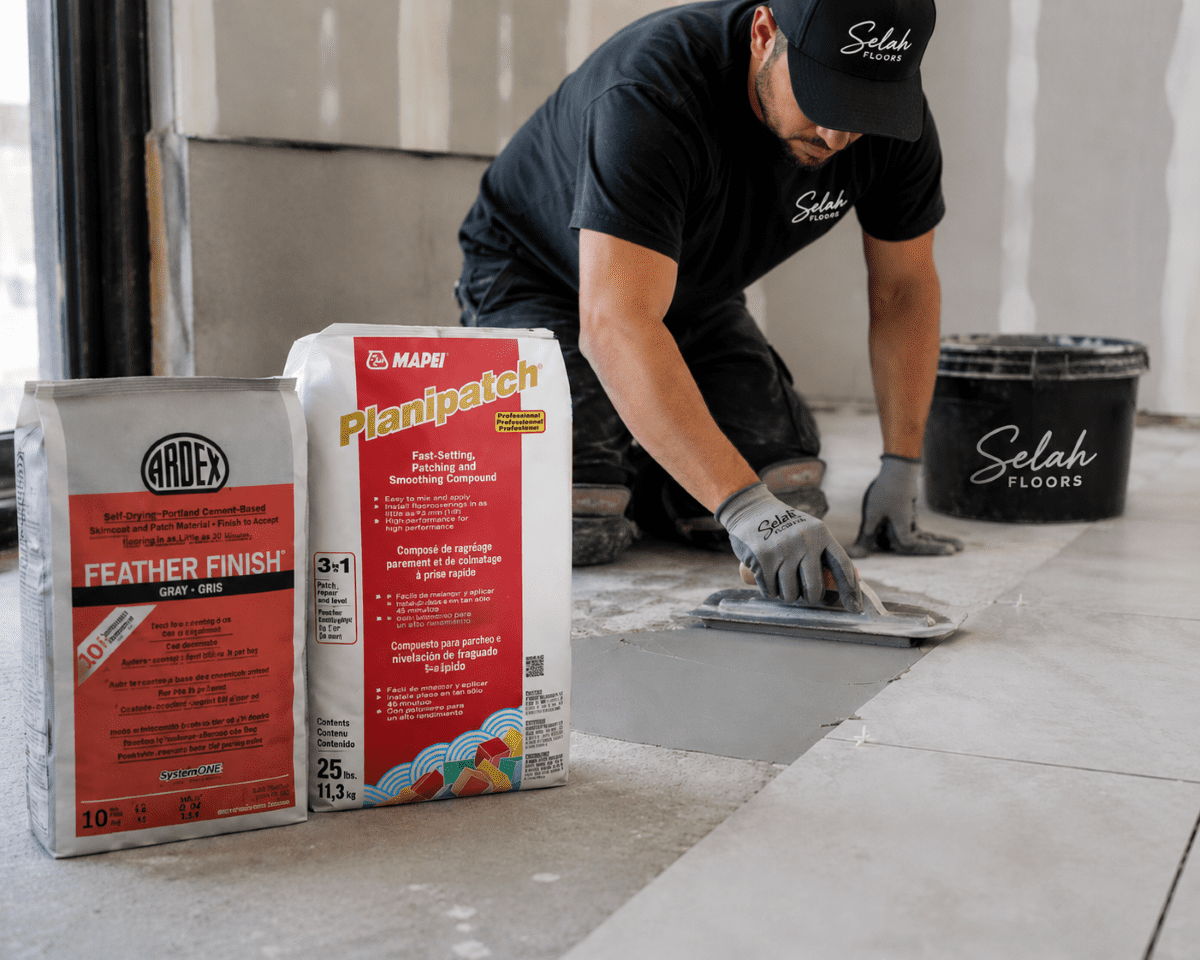
Too much moisture = flooring failure. The fix might be a moisture barrier, a skim coat, or in severe cases, a vapor-blocking sealer.
2. Check for Flatness (Not Levelness)
There’s a common mix-up here. Level means perfectly horizontal. Flat means no bumps, dips, or ridges. For flooring, flat is what matters.
Most flooring manufacturers require the subfloor to be flat within 3/16 of an inch over 10 feet. Low spots get filled with floor-leveling compound. High spots get ground down.
3. Look for Cracks
Small hairline cracks in concrete are normal and usually not a problem
. Larger cracks or ones that show vertical displacement need to be addressed before installation — especially for tile or hardwood.
4. Clean the Surface
Adhesive residue, paint, dirt, and old leveling compound all need to go. A clean surface ensures proper bonding and accurate flatness readings.
Wood Subfloor Prep
Wood subfloors require a different kind of attention. They’re more forgiving in some ways, but they have their own set of issues.
1. Check for Squeaks
Walk the entire floor. Every squeak tells you something — usually that a panel isn’t properly fastened to the joist below. The fix is simple: screw the panel down in the squeaky area. Do this before new flooring goes on top, or you’ll be listening to it forever.
2. Check for Soft Spots
Push down with your foot. Any give or sponginess is a red fl
ag. Soft spots mean moisture damage, rot, or delamination. Those sections typically need to be replaced before installation.
3. Check for Flatness
Same 3/16″ over 10 feet rule applies. Low spots can be filled. High spots — often old adhesive ridges or fastener heads — get sanded or ground down.
4. Check the Thickness
Most flooring products require at least 3/4″ total subfloor thickness. Thinner panels may need a layer of underlayment or additional plywood to bring them up to spec.
5. Check for Moisture Here Too
Wood swells with moisture. A moisture meter tells us whether the subfloor is within acceptable range. If not, we find the source — a slow leak, poor ventilation, condensation — before installing anything over it.
What About Existing Flooring?
Sometimes new flooring goes over old. Sometimes it doesn’t. Here’s the general rule:
- LVP and laminate can sometimes float over existing tile or vinyl as long as it’s flat and firmly adhered.
- Hardwood almost always needs to go directly on the subfloor — no layering.
- Tile should go on a clean, bare subfloor or a properly installed backer board. Not over vinyl. Not over carpet.
- Carpet can go over most flat surfaces with the right pad.
When in doubt, the right call is usually to pull up the old flooring. It adds time, but it means the new floor goes in on a known surface — no surprises hiding underneath.
What Selah Floors Does Before We Install
When we take on a flooring project, subfloor assessment is part of the job — not an upsell. Before we bring a single box of material into your home, we check:
✔ Moisture levels
✔ Flatness throughout the room
✔ Structural integrity (soft spots, squeaks, damaged areas)
✔ Whether existing flooring needs to come up
✔ What prep work is needed and what it’ll take
We’re not going to install beautiful floors over a problem subfloor and call it done. That’s not how we operate.
Ready to Get Started?
If you’re in the Pearland, Friendswood, Manvel, Alvin, League City, or Missouri City area, we’d love to come take a look. We bring samples directly to your home, assess your subfloor, and give you an honest picture of what your project needs — start to finish.